
The dream of a luxurious outdoor kitchen—complete with granite countertops, stainless steel appliances, and built-in grills—often comes with a nightmare price tag, easily soaring into the tens of thousands of dollars. This steep cost often sidelines the project for most homeowners.
However, the core function of an outdoor kitchen is simple: to move cooking and entertaining outside. Achieving this goal doesn’t require bespoke cabinetry or imported stone. With smart design, resourceful material choices, and savvy DIY execution, you can build a highly functional, stylish outdoor cooking area that looks custom-made but costs a fraction of the high-end installations.
This comprehensive guide proves that you don’t need a massive budget to create a stunning, efficient outdoor kitchen, focusing on strategies that maximize impact while minimizing spending.
I. Strategic Planning: Redefining “Kitchen” Outdoors

The first step to saving money is redefining what an outdoor kitchen must contain. A budget kitchen focuses on the essentials: a cooking surface, a preparation counter, and storage.
1. Embrace Portability and Existing Assets
The biggest cost saver is avoiding built-in, custom utilities (gas lines, complex plumbing, electrical wiring).
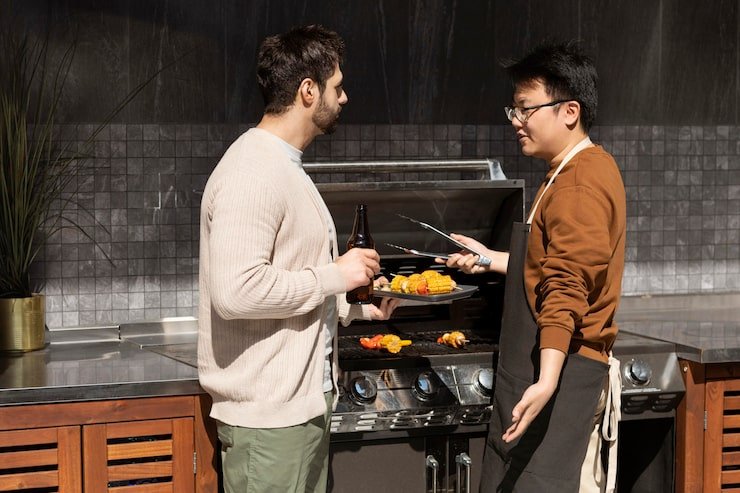
- Utilize Your Existing Grill: Instead of buying a $5,000 built-in appliance, design the kitchen around your existing, high-quality standalone grill. The budget focuses on building functional counter space on either side of the grill, not replacing it.
- Skip the Sink: Running a new water line and drain system is incredibly expensive. Instead, rely on a portable cooler or a dedicated beverage cart for ice and drinks, and use your indoor kitchen sink for cleanup. If water access is essential, look into simple garden hose quick-connect taps rather than permanent plumbing.
- Go Propane or Electric: Avoid the high cost of trenching and installing permanent natural gas lines. Stick with easily exchangeable propane tanks for your main cooking source.
2. Maximize Material Efficiency
Design your counter lengths and cabinet sizes to match standard, off-the-shelf lumber, tile, or stone dimensions. Custom cuts add labor and waste, which inflates the price. Simple, modular designs are your budget best friend. Focus on straight lines and avoiding curves, as curves demand specialized, expensive materials.
II. Budget-Friendly Construction: DIY Structure and Materials
The frame and the countertop are the core costs. By opting for smart, DIY-friendly materials, you can drastically reduce expenses.
1. The Concrete Block or Wood Frame Base
Forget expensive outdoor cabinet boxes made of marine-grade polymer or pricey composite panels.
- Cinder Block Structure (The Ultra-Budget Winner): Cinder blocks (or concrete masonry units—CMUs) are incredibly cheap, durable, and naturally fire-resistant. You can stack them to form the base of your cabinets and grill surround using concrete adhesive or simple mortar. Finish them by applying a simple stucco or concrete resurfacer coating, or by painting them with masonry paint. This provides a clean, modern, high-end look that belies the cheap materials beneath.
- Simple Wood Framing: Build the frame using pressure-treated lumber (essential for outdoor use and direct contact with concrete). Instead of using expensive composite siding, clad the frame with inexpensive, weather-resistant materials like cedar fence pickets or simple board-and-batten style paneling applied in a vertical or horizontal pattern. This custom cladding adds warmth and sophistication for a fraction of the cost of composites.
2. The Smart Countertop Hack
Custom granite and quartz are out. These alternatives provide durability and style for much less:
- Poured Concrete Countertops (The Best Value Look): Poured-in-place or pre-cast concrete countertops are highly durable, trendy, and incredibly affordable if you pour them yourself using melamine molds. The materials (cement, sand, and aggregate) are cheap, and the result is a custom, modern, industrial look that rivals high-end stone. Be sure to use a marine-grade sealer for weather protection.
- Large Format Tile: Use large format porcelain tiles (24”x24” or larger). These tiles are water-resistant, incredibly durable, and much cheaper than slabs. By using large tiles, you minimize grout lines, which makes the surface look cleaner, more like a continuous slab, and significantly easier to maintain, mimicking the look of expensive stone.
- Butcher Block (Treated): While wood is generally risky outside, a thick butcher block countertop (often affordable from warehouse stores) can be a beautiful prep surface if properly sealed with a marine-grade varnish or exterior oil finish. This is best used in a covered patio area and instantly adds warmth to a concrete base.
III. Appliances and Storage: The Thrift and Efficiency Approach
High-end brands blow the budget immediately. Look for clever alternatives and focus on maximizing storage that is shielded from the elements.
1. DIY Storage Solutions
Custom outdoor drawers and expensive cabinetry are unnecessary for most users.
- The Curtain Trick: Build simple, open shelving into your wood or block base. Instead of expensive doors, cover the front with weather-resistant exterior curtains or fabric panels hung on a rod. This hides clutter, adds a soft aesthetic touch, and costs almost nothing while providing easy access.
- Repurposed Cabinetry: Look for used stainless steel commercial kitchen cabinets or shelves from restaurant supply stores. These are built for durability, easy to clean, and usually cheaper than residential outdoor units, offering an industrial-chic aesthetic.
- Use Affordable Doors: If you must have hinged access, purchase standard-sized outdoor access doors (typically polymer or stainless steel) from big box stores—not custom doors from high-end outdoor retailers. Stick to standard sizes to avoid fabrication costs.
2. The Appliance Swap
Spend money on quality cooking appliances, not flashy features.
- The Pizza Oven Alternative: Instead of a complex, expensive smoker or a high-end gas griddle, incorporate a simple, budget-friendly DIY outdoor pizza oven using fire bricks and a stucco exterior. This becomes a functional focal point and a high-utility cooking source for minimal material cost.
- The Mini Fridge Upgrade: Instead of a pricey outdoor-rated stainless steel refrigerator (which is very expensive), purchase a quality dorm-sized mini-fridge. Build it into your cabinet base and ensure the area is well-ventilated and preferably covered. While not explicitly outdoor rated, in a sheltered area, a good quality mini-fridge can provide years of service at a fraction of the cost. Ensure it’s protected from direct rain.
IV. Aesthetic Upgrades That Cost Pennies
These simple DIY finishing techniques add the “no one will believe it’s DIY” polish to your project, elevating it from a functional space to a sophisticated entertaining area.
1. The Backsplash Finish

A beautiful backsplash elevates the space from utility area to custom kitchen.
- Inexpensive Tile: Purchase simple, large subway tiles or standard mosaic sheets, which are extremely affordable. The labor is the primary cost, but doing it yourself saves hundreds. Choose a neutral grout color to minimize maintenance and maximize the clean look.
- Faux Stone/Brick Veneer: Use thin, easy-to-apply faux stone or brick veneer sheets (often cementitious material) behind the grill. These are lightweight, fire-resistant, and mimic the look of expensive masonry work for minimal cost, adding massive texture.
2. Lighting Ambiance
Good lighting makes any space look intentional and custom, instantly raising its perceived value.
- Solar Power: Use inexpensive solar-powered LED strip lights under the counter edges. This provides beautiful, sophisticated ambiance (undercabinet lighting) without needing to run any complex, costly outdoor electrical lines or transformers.
- String Lights: Hang commercial-grade string lights (Edison bulb style) over the kitchen and dining area. This creates a warm, inviting atmosphere that instantly feels high-end and is very cheap and easy to install.
Conclusion
The dream of an outdoor kitchen does not have to be exclusive to homeowners with unlimited budgets. By shifting focus from expensive, specialized components to smart, resilient, and resourceful DIY construction, you can achieve a highly functional and aesthetically pleasing outdoor cooking space for a fraction of the cost.
The secrets lie in adopting simple structures (cinder block or pressure-treated wood), utilizing affordable countertop materials (poured concrete or large porcelain tile), and making smart compromises on utilities (skipping the sink and running propane). Furthermore, the true measure of success comes from the polished finishing touches—the stucco coating, the clever curtain storage, and the layered ambient lighting—which elevate the space and make it look truly custom. By focusing on function and style over brand names and complex utilities, your backyard will become the envy of the neighborhood, and the secret of your budget will remain your own. This project proves that with creativity and elbow grease, high-end outdoor living is completely attainable on a budget.